FormIt vs SketchUp

FormIt vs SketchUp


Update: 3/24/15

FormIt has made some much needed improvements which better help it complete against SketchUp.  We plan to change our below post as soon as we have time.  Some of our below constructive criticism has been addressed.  

–Original post–

Last week I had the pleasure of attending an AIA training day in Concord NH.  One of the presenters was Tom Vollaro, the Senior Principal User Experience Designer for FormIt as well as an employee at Autodesk.  My first impression as Tom pulled out his iPad and Loaded FormIt.  “Wow that is pretty impressive, he is going to model something live on an iPad with an audience of architects.   That takes some guts.”

I was pleasantly surprised how simple it was to use and navigate.  Yes, FormIt is really cool, and I can see the benefit of sketching something onsite on your Ipad.  No other app that I know of can do this.  The problem with FormIt, right now is it is only capable of handling simple massings.

Here is what FormIt does well:

  • Works on iPad, so massing spaces on site is a pretty cool feature
  • Can also be formatted into a Revit file

What is FormIt lacks:

  • No ability to create groups
  • No ability to create components
  • Precision modeling tools are lacking
  • Missing libraries of content similar to SketchUp. If you feel the need you can import models from SketchUp, but that is a lot of extra work.

Though FormIt has a number of great sketching tools, it still lacks the user ability and features that makes SketchUp such a great program for massing.

At the meeting, Tom was very tight lipped about the cost of FormIt.  It was my impression after listening to Tom, FormIt, like SketchUp will have a free version available.  But, if you want more advanced functionality like importing your model into Revit you are going to have to pay an undetermined fee.

Interesting side note:

FormIt crashed during the live presentation, but the application picked back up exactly where it was when it loaded.  We spent an additional 10 or so hours playing around with FormIt in the office without a crash.  I would say it is a pretty stable program, and it is nice to see, that if there was a problem, we wouldn’t lose our work.

Can you create a detailed model on Formit?

Currently no, I would say FormIt is a great start but it has a long way to go to catch up to the functionality of SketchUp. FormIt is a great application in the making and you should follow it as it develops, but isn’t ready to replace Sketchup.

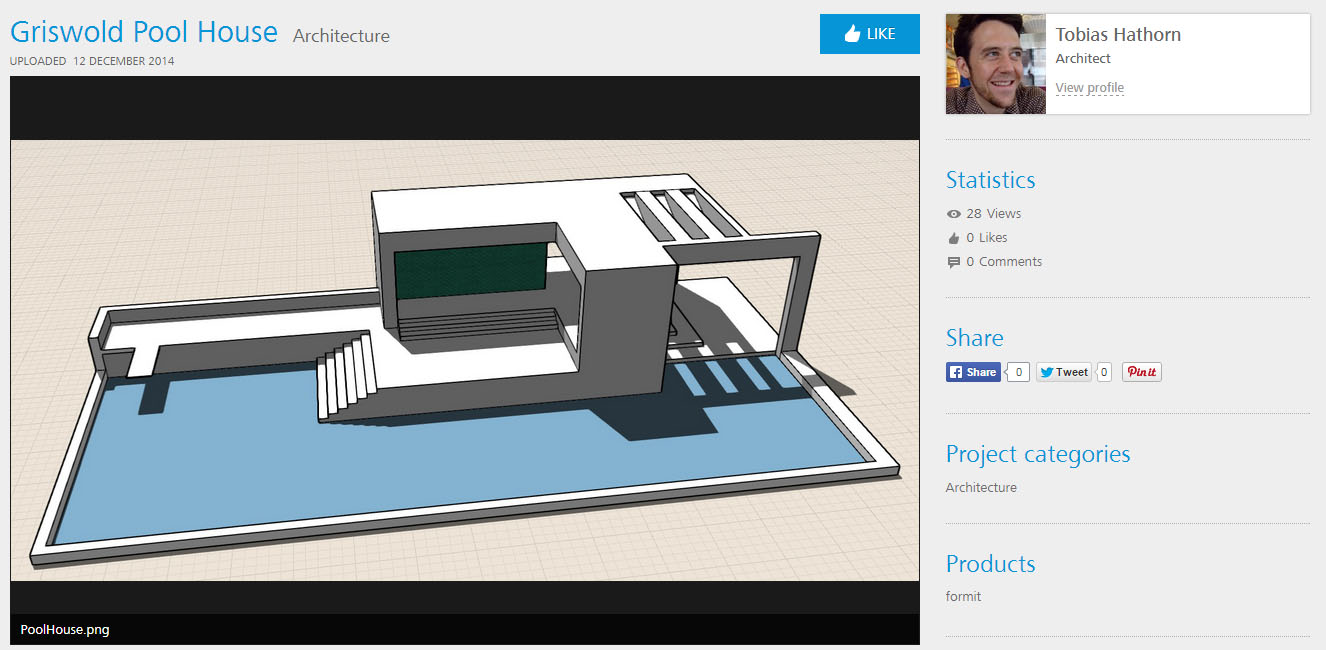
If you are interested in more information or you want to try out the application, you can find more information here.

PiXate Creative 3D Workflow Process: Step 4, Model Detailed Models

Have you ever heard the saying, “It’s hard to see the forest through the trees?” This saying pertains to 3D rendering as well as our company, PiXate Creative but for a different reason. Architectural rendering as a complete process is indeed time consuming and requires strict attention to detail.

The reason architectural rendering takes such good chunk of time is there is a number of drafts and details we go through to deliver a final product that will undoubtedly satisfy the customer. If we were to create the first draft and then send it off to the client, it would more than likely end up requiring a number of changes or a complete re-work.

A lot of clients have a design in their head, but have a hard to expressing what they are looking for. Our job is to work with them to get their vision on paper and make the image shine. In most cases there is some back and forth between us and the client. Not to worry though, PiXate Creative promises to take on the majority of the “heavy lifting” and get you the results you are looking for.

For this reason, we start off massing the space and adding details to the image as the image progresses. We find this to be a much more effective approach as we are able to pick up on details we would normally miss and refine the image according to the look and feel.

Since     2007, we have built an extensive library of 3D models that we have continually refined and edited. By having such an extensive library of renders at our disposal, a majority of our detailing work is usually added by simply dragging and dropping different aspects of the 3D render.  The enables us to focus on creating high quality images at a much faster rate.

We also offer options for clients who prefer a more “hands off” approach throughout the entire 3d rendering process. We provide a finished image that is handled completely internally, making the work for the client as minimal as possible.


Emulating Successful Architects to Improve 3D Rendering Techniques

When looking at what defines a successful 3D render from an unsuccessful 3D render, there are a number of factors to take into consideration. From the realism of the work to the actual presentation of the render, some of the most successful architectural 3D renders are able to capture the client’s attention and paint a picture of the final product.

Archdaily, the world’s most visited architectural website, displays some of the finest 3d rendering work from around the world. Each day thousands of individuals visit this website to view some of the highest quality 3D renders, articles relating to architecture, and interviews. Archdaily provides 3D renderings from all across the world, showing how drastically different the architectural vision is in Europe, North America, and Asia.

Archdaily also provides a number of resources to increase your breadth of knowledge including online courses, webinars, and giveaways. Each 3D render provides a detailed description of what is being displayed as well as the artists’ interpretation and the meaning behind every element of the render.

2014 12 01_2046   PiXate2 s library


As you can see in this render, the artist EFFEKT was able to transform an unused train shed in Esbjerg, Denmark into an industrial stylized building inspired by street culture. From the details of the skateboard park to the landscape outside of the building, it is easy to visualize how this would look once the renovations are complete. By inserting people into the render, it further enhances the realism of the work and provides a sense of how the space will look when occupied by people. Overall the quality of work and detail in the picture shows how to successfully create the most realistic 3D render possible.

This website along with many others provides an inspiration to broadening one’s architectural style. By emulating the 3D renders displayed by other successful renders, it can enhance the quality of your work and open your eyes up to new techniques and strategies.

From the shadowing to the use of color, each element of the 3D render has a specific purpose. The goal of the render is to provide the most realistic interpretation of the building and/or room by refining every detail possible.


3D Interior Rendering

Commercial projects are a great place for our 3D rendering services.  In a number of cases, businesses will spend a majority of their budget to ensure their space is visually appealing and organized.When walking into a building, a first impression is everything. From the décor of the building to how the look and feel appears, businesses want to impress their employees, vendors and most importantly clients and prospects.

When designing a space to display to perspective clients, most individuals generally have a difficult time visualizing massing models or CAD elevations. To make the process easier, have the experts at PiXate Creative provide a 3D commercial interior render for your business. 3D commercial renders can be extremely powerful when you, the architect, have the ability to show your client actual furniture pieces with actual fabrics and textures applied to the model.

Here is an example of what a client of ours would send us:

notes


If you have created a furniture plan for your business prior to our first meeting, have us put together a photo realistic 3D render for the interior of your building  

Initial 3D Interior Render for Office Building

Here is an office builiding we did a 3D interior render for to help the client visualize what the final product will look like.


Using high quality 3D renders can give your architecture firm a leg up on the competition. These renders will position your firm as an expert capable of showing future clients how the space will look. With our years of experience in 3D rendering, we have started to build a catalog of 3D vs. actual spaces. Our clients are using these images in their presentations to attract future clients as well

Final Product from 3D Interior Render


Boston Rendering

An in Depth Look into a Boston Rendering

The attached image was created for Nelson, a global design, architectural firm, engineering, space planning and space management firm headquartered in Pennsylvania.  Beacon Capital was the end user and they wished to have an image created which their Real Estate Professionals could use to generate excitement about the existing vacant retail space on the ground floor of 745 Atlantic.  Our client came to us with a request.  They needed an image created ASAP to show how the space might look but couldn’t internally hit their deadline.   They turned to PiXate Creative to pull off the render in a professional and efficient manner.  Nelson, uses both Revit or SketchUp and in this project we received a SketchUp file.


Boston Render


Step 1.

The first step of this process involved acquiring the SketchUp files provided by the client and moving them to the program Houdini. This enables us to provide our clients with a visual representation of the final product by creating the most realistic photo illustrations.

step1-cleanup


Step 2.

Defining the camera helps “paint a picture” for what the building will look like when it is finished. Since there was currently an existing building in place, our client asked us to improve the look of the building for marketing purposes.

step2-define camera


Step 3.

In this step we apply lighting to the image via HDRI. HDRI carries light information including the relationship between the location of the building and how the sun will hit the building.

step3-lighting setup


Step 4.

Along with the actual 3D render of the building, we provide additional models to the scene to create a more realistic final product. With the additional models, it provides our clients with a clear and vivid picture of what their building will look like when it is actually constructed.

step4-more details


Step 5.

In this step you can see how we applied a number of materials and textures to make the image more realistic. From the lighting in the windows to the people walking around, we want to provide the most realistic 3D render we possibly can. By applying textures, you can see some of the finer details of the render as well such as the color of the building or the reflection of the glass. You can also see the discolorations on the brick giving the look of imperfection.

step5-materials


Step 6.

As you can in this step, we adjusted the render settings slightly enhance the quality of the image. This part of the process is rather complex due to the number of settings needed to make the image look great. If you are interested in hearing more about this step, send us an email to info@pixatecreative.com.

step6-render settings


Step 7

The final portion of the process involves adding post process effects to the 3D render through either Photoshop or Nuke. Once this step is complete, the image is ready to be presented to the customer for final approval. As you can see the people were added to the post process and not rendered in the images. Sometimes we add people to the image during the 3D process; we will have a future blog discussing when to add people in 3D renders versus Photoshop, so keep a look out!

ste7-post

PiXate Creative 3D Workflow Process: Step 3, Refine Camera

The next step of the PiXate Creative 3D Workflow process involves refining the camera to fit the needs of the client. The purpose of this step is to help envision the space from multiple camera angles. This provides the client with a complete visualization of how the space will look and “feel” like.

We work with hand-in-hand with our clients to help create the best possible 3D render for their final vision. One problem we have noticed is the inability to fully visualize the space of the 3D render. By displaying the space through multiple angles, it gives us a chance to notice problems that may arise and fix the look and feel of each render.

Direction of the Light

When refining the camera angle on our 3D render the contrast, shadow, and texture play a large part not how the final image will appear. Furthermore, common problems such as high levels of exposure can be easily corrected with the proper use of exposure compensation.

Providing a Vision

Sometimes, visualizing the final product can be a difficult process especially if there is an empty plot of land. Here at PiXate Creative we bring yout building to life using a combination of the latest is 3D architectural technology and photography.

Research is Key

Before we begin to take pictures, from a small home to a skyscraper, we always preform extensive preliminary research and background research. We look for common focal points on each building that attract our customer’s attention. We use our combination of research and the focal points to generate the most realistic looking 3D render possible.

Choosing the Look and Feel

When choosing our images, we focus not only making our images more aesthetically pleasing but providing movement and dynamism to them as well. Our ultimate goal is to capture symmetry through the image and provide our client with the best possible visual representation of the building.

For more information of the entire PiXate Creative 8 step 3D workflow process, click here.

Drones for Civil Engineering and Architecture

Using drones for civil engineering and architecture can be incredibility fun, but it can also be very helpful to move your projects through the approval stage as well.  The modern drone with a camera practically flies its self, connecting to a GPS satellite and locking into place.  In a recent project in Hampton, NH we took our drone for a spin!  Here is our drone taking a picture of us, as we took a picture of it.  That is me with the iPad.

drone


Drones can be extremely helpful for use in architectural visualizations.  There are several reasons they are so effective.

  1. Not many people are using drones yet, so the pictures are unique.  When something is unique, people pay attention to it.  A unique image allows for you to grab people attention because it is something they are not used to seeing.
  2. It is much less expensive to use a drone than a helicopter.  To rent a helicopter you are going to look at spending $3k – $5k or so just to get the helicopter in the sky.
  3. Drones can show you a the entire context of what is around.
  4. Ariel photos are much harder to recreate, so there can be more artistic license because the perspective can never be seen by the average person walking down the street.
  • Not many people are using drones yet, so the pictures are unique.  When something is unique, people pay attention to it.  A unique image allows for you to grab people attention because it is something they are not used to seeing.
  • It is much less expensive to use a drone than a helicopter.  To rent a helicopter you are going to look at spending $3k – $5k or so just to get the helicopter in the sky.
  • Drones can show you a the entire context of what is around.
  • cute phone casesphone caseyukon vape

  • Ariel photos are much harder to recreate, so there can be more artistic license because the perspective can never be seen by the average person walking down the street.
  •  

    Drones for Architecture
    Drones for Civil Engineering


    There is a common theme around architectural renders.  The general population has a very hard time picturing how projects will look when they are complete.  Control the narrative and show people who it will look.  You will be rewarded by having your projects go more smoothly.  Drones can be a really powerful tool in your arsenal, so make sure and develop some relationships with companies that have them, or pick one up and learn to fly it.  We will show you a really good build in a future post, or you can email me at jkutyla@pixatecreative.com and we would be glad to share our setup with you.

    Pixate Creative 3D Workflow Process: Step 2, General Massing

    General Massing in architecture refers to the overall shape and size of the building. Most Architectural styles are usually defined by the use of massing, but, some focus on other aspects of the building taking away from the massing process.

    If a buildings massing is not proportional, no amount of extravagant details will compensate for the lack of proportion. Massing gives the building form, providing an emotional connection with the individual.

    General massing provides an excellent way for the client to understand the overall space of a building. It gives our clients the best possible perspective of the building and provides them with visual representation of the final product.

    best replica watchs10 phone caseelf bar k酶belf bar 芯褎懈褑懈邪谢褜薪褘泄 褋邪泄褌dior phone casetelefoonhoesjes initialen

    Here at PiXate Creative, we work with our clients to provide the best possible results with the use of massing as the foundation. For more information on our 3D workflow process, contact us today at 603.899.7495!

    The Rule of Thirds… Why is it so Important for 3D Architecture?

    One of the most well-known concepts of both 3D architecture and photography in general is the “Rule of Thirds”. The Rule of Thirds is one of the most basic foundations necessary to create an image that is both well balanced and symmetric.

    s20 phone casecolorful phone case9elf hamburg

    The basic premise behind the Rule of Thirds is to imagine an image that is broken down into thirds both horizontally and vertically for a total of 9 equal parts. The rule of thirds discourages the simple notion of placing an image in the middle and enables you to align the subject along one of the horizontal or vertical guidelines.

    Screen Shot 2014-10-16 at 16.35.19

    https://www.traditionrolex.com/46

    Screen Shot 2014-10-16 at 16.35.19

    These guidelines display important sections of your image, known as points of interest, and enable you to readjust your image accordingly. If your image is placed at one of the points of interest, it creates a more balanced look allowing the viewer to see the image more naturally.

    It has been proven that people’s eyes tend to drift towards these intersection points naturally rather than the center of the image, so, using the Rule of Thirds works as the most natural way of viewing an image.

    Pixate Creative 3D Workflow Process: Step 1, Gather Resources

    PiXate Creative provides our clientele with a number of comprehensive illustration strategies coupled with our attention to detail and workmanship. The first of our 8 step program involves gathering the necessary references needed to begin the initial process. We work personally with our clients to create photo-realistic illustrations using the only the latest in 3D workflow technologies.

    2014-10-10_1521
    replica watch saleelf bar vape holdercual es el barrio mas peligroso del mundo

    • AutoCAD files: AutoCAD is a commercial software application for both 2D and 3D design, used to help develop, design, and draft for your specific project at hand. It provides a visual representation of the project and gives you an idea of what the final product will look like.
    • Revit: This tool is used by architects and allows them to design the structure and various components in 3D, edit the model with 2D elements, as well as other important structural information.
    • Archicad files: This is architectural software that helps handle all aspects of the look and feel of the entire design process, from the interior of the building to the exterior.
    • SketchUp: SketchUp is a 3D modeling program commonly used for architectural work. This program works by enabling us to draw in 3D and create realistic looking models to help our clients visualize the final product.
  • AutoCAD files: AutoCAD is a commercial software application for both 2D and 3D design, used to help develop, design, and draft for your specific project at hand. It provides a visual representation of the project and gives you an idea of what the final product will look like.
  • AutoCAD files:

  • Revit: This tool is used by architects and allows them to design the structure and various components in 3D, edit the model with 2D elements, as well as other important structural information.
  • Revit:

  • Archicad files: This is architectural software that helps handle all aspects of the look and feel of the entire design process, from the interior of the building to the exterior.
  • Archicad files:

  • SketchUp: SketchUp is a 3D modeling program commonly used for architectural work. This program works by enabling us to draw in 3D and create realistic looking models to help our clients visualize the final product.
  • SketchUp: